Navigation bar and footer widgets
The site-wide header with your logo and menu links, and the footer with contact info and social links.
Where to find it
Website (left sidebar) → open a page → Sections tab → Add Section → "Navigation Bar" or "Footer"
The Navbar widget is your site's header — logo, menu links, and action buttons like Book Now. The Footer widget is the bottom section with your business info, link columns, and social icons.
Where to find it
Website → open a page → drag Navbar or Footer from the widget picker.
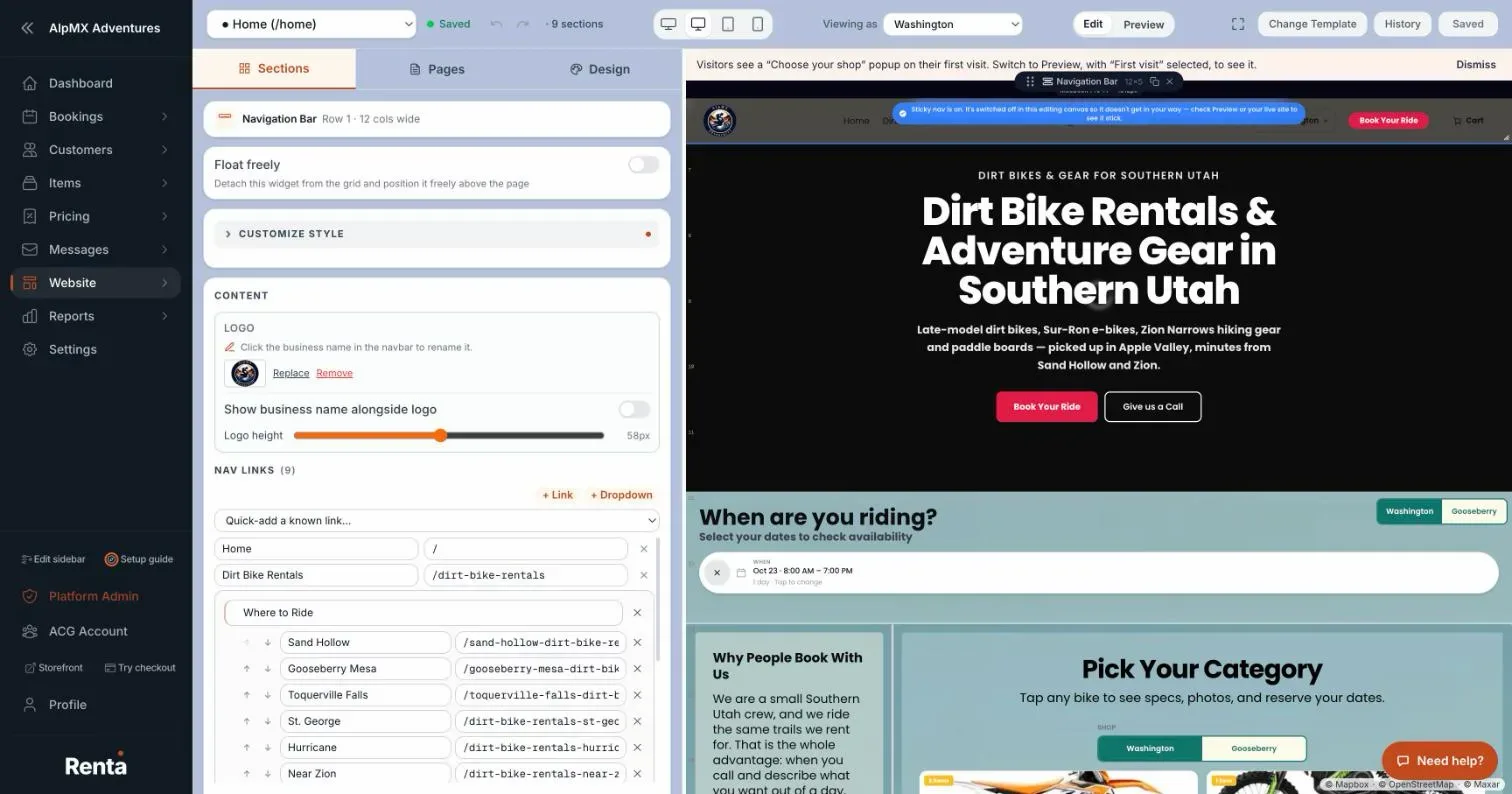 The Navbar widget's settings panel with logo, links, and buttons
How it works
Navbar
- Logo text and optional logo image: your brand name and/or uploaded logo. If both are set, the image shows next to the text unless you hide the text.
- Links: your menu items, in the order you add them. You can also nest links under a dropdown.
- Auto-include published pages: when on (the default), every page you publish is automatically added to the menu — no extra step needed. Manual links you've added always come first.
- Buttons: right-side action buttons, like a "Book Now" link or a shopping cart button that opens the cart drawer with a live item count.
- Style: Light, Dark, or Transparent background.
- Layout: logo on the left (default) or logo on the right.
- Sticky: keeps the navbar pinned to the top of the screen as visitors scroll.
- Overlay: makes the navbar float over the widget below it instead of pushing it down — often paired with a Transparent style over a hero video.
- Show on all pages: renders this navbar at the top of every page on your site, not just the one it's placed on.
Footer
- Business name and Tagline: your name and a short one-line pitch.
- Copyright text: small print at the bottom; use "{year}" to always show the current year automatically.
- Link columns: up to 3 grouped columns of links.
- Social links: icons linking to Twitter/X, Instagram, Facebook, YouTube, TikTok, or LinkedIn.
- Style: Light (white background, dark text) or Dark (charcoal background, light text).
Example
A dirt bike rental shop might set the Navbar to "Show on all pages" so it's consistent everywhere, add a "Book Now" button on the right, and turn on Sticky so it stays visible as customers scroll a long fleet page.
If you have more than one shop
With two or more shops, the navbar automatically shows a shop picker so customers can see and change which shop they are booking at. On phones it appears as a slim "Pickup at [shop]" bar under the navigation with a Change button. In the navbar's settings you can place the picker By links or By buttons. A single-shop business sees nothing extra. See Running more than one shop.
Good to know
- Both the Navbar and Footer span the full width of the page, ignoring your normal side margins.
- If a manual navbar link points to the same page URL as an auto-included published page, your manual link wins and the automatic one doesn't duplicate it.
Related articles
- Website widgets — common questionsQuick answers on adding and setting up each website block (hero banner, fleet grid, photo gallery, Book Now button, contact map, reviews, FAQ, navbar, footer and more), and why a block may look empty on your live site.
- Date picker and Book Now button widgetsLet visitors pick rental dates right on the page, or add a standalone button that jumps straight to checkout.
- The fleet grid widget (showing your items for booking)Displays your rentable items — or your categories — as a browsable grid or carousel that customers can click into to book.
- Website AI assistantTurn on Renta's own chat assistant for your public website. It answers customer questions from your live rentals, prices and availability, and is paid for with AI credits.
- Reviews and FAQ widgetsShow your customer reviews in a list, grid or carousel, and answer common questions in a collapsible FAQ list.
Still stuck? Ask the chat.
Was this helpful?